calculator
4 Doing longer calculationsusing you calculator
The amount of timber (in cubic metres) within a log with a length of  metres , with the middle of
  metres is given by the formula
If you take a log measuring 1.5 meters, with a distance in the middle of 92 cm, this would be
In this part, we'll look at several different methods that can be used to evaluate this , as well as other more complicated expressions using various functions on your calculator. While the method we first discussed that we will discuss in Activity 9 - is the easiest approach for the relatively simple expression but it's also helpful to think about how you can make use of different calculatorfunctions when you have more complex equations to be evaluated.
The expression for the volume of wood needs the values of  . You could enter an approximate value using your fingers however, this takes a lot of time and could lead to errors. The calculator offers an approximate solution included that is calculated using an algorithm called the key sequence

 .
.
The key is located in the lower row of the keypad.
Activity 9 Using the fraction key
The easiest way to the calculation 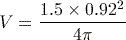 is to put it in fractions in your calculator.
What key sequence is needed to determine the ultimate answer to three significant figures?
Another way to do the calculation in Activity 9.9 would be to use key.  keys.
keys.
Activity 10 Using the key
It is not possible to get the right answer to the calculation
If you write
in your calculator and press  . Can you explain why? Add a bracket into the expression with the / sign , so that it will give you the right answer. Enter the phrase into the calculator and ensure that you get the same answer that you did in the previous activity above.Reveal the answer
4.1 Reusing an earlier result
Another alternative to our calculation is to calculate the denominator of the fraction first and then divide the numerator by this.
You can record the answer to the first portion in the equation on a piece of paper and then enter it in the calculator once more. However, it's possible that you've made an error in recording the number or when typing it into the calculator. It is better to utilize the fact the calculator will save the last calculated answer, which can then be added to the next calculation by using the  keypad in the lower part of the keypad.
It is important to note you should note key can only store the outcome of your previous calculation.
Activity 11 Bottom is first!
Use your calculator to determine that the amount of the denominator of  the formula, and then finish the calculation by finding the value from
  up to three important figures.Reveal the answer
4.2 Utilizing the calculator memory
An alternative to the above procedure is to break the calculation into two separate parts, and then utilize the memory functions that are available in calculator memory functions calculator in order to save the outcome of the first portion. The calculator memory function is especially helpful when you are trying to calculate the values of several expressions that share a common portion. The common part should be entered only once , with its value reused several times over the course of time. As an example, you could rewrite the formula for the volume of wood within a log as
it is clear that, regardless of the values in as well , the formula must always be based on the value of  . If we wanted to determine the amount of wood that is contained in several different logs, it may be more efficient to calculate the amount of one time, then store it in memory , and then reuse this value in the subsequent calculations.
The calculator contains a variety of memory. The first memory we'll look at is the 'M' memory, accessible via the  key (and its associated functions) at the bottom left-hand portion of the key area.
Before using your calculator memory, it is recommended to clear the previous data saved within the calculator using keysequences (CLR) (Memory) (Yes) .
Make sure to clear all the calculator memories.
To store the result of an expression that you have just calculated(i.e. an answer displayed in output area of the calculator display) in the "M" calculator memory, you can use this key sequence  (STO) (M). The key here is an additional function that is available on the (or recall) button, also known as "STO" (or store). After selecting the store function the next step is to tell the calculator what memory the data will be saved to. These memories are labelled in red on a few keys on the calculator keys and the memory 'M' can be obtained by pressing the key. We can interpret the key sequence as'save your current results in the memory of the M'.
Once (or (STO)) is hit, the display indicator the RCL (or STO) is shown on the screen to indicate it is the calculator is waiting for which memory to read (store) to store the result from (in).
To display the contents of the memory for 'M to display the current contents, press (M). The data stored in memory can be utilized as part of a later calculation by inserting the 'letter"M" into the appropriate location of the expression  (M). For example, to find how much of the value is currently stored in the 'M memory we can make use of the sequence of keys (M) .
When there's a number stored in the 'M' memory The display indicator M is displayed on the upper of the monitor.
Activity 12 using memory
Save the value within the memory 'M' of the calculator and then use this stored value to assess  to 3 significant figures.Reveal the result
4.3 Other memory 'M' operations
The value stored in the memory 'M' can also be changed by subtracting or adding the result of a further calculation:
-
To add the result from the most recent calculation to the value currently in the memory by pressing .
-
To subtract the result of the latest calculation from the value currently in memory, make use of the sequence of keys (M-).
Expressions can also be stored on, added or removed from memory simultaneously as it is evaluated through replacing at the conclusion of a calculation with any of memory access sequences. For example, to calculate and then store the results directly into memory, employ the sequence key (STO) (M).
To delete the memory of 'M' on its own you need to store zero within it using the key sequence (STO) (M).
4.4 Other memories
The calculator includes six additional memories, which are labelled as "A," "B," and 'C'. The other memory names are 'D", "X" and "Y' that can be accessed by using several of the keys in that lower part of function key area of the calculator. Each memory's name appears in red over the key to access it.
They can be utilized exactly the same way as the memory 'M', except there are no alternatives to the 'add to memory' ( ) as well as'subtract from memory' ( (M+)) functions and there are no display indicators.
5 Scientific notation on you calculator
Calculating numbers using scientific notation on your calculator
If the result of an equation is a number greater than or equal to  (i.e. ) (i.e. ), the calculator will display the result in scientific notation. For instance the calculation
  provides the answer
 ,
,
The calculator screen as it is shown here.
Small numbers are automatically shown with scientific notation. However, how small the number needs to be for this to happen will depend on what mode the calculator is operating in:
-
'Norm 1" mode makes use of science-based notation when referring to any number that is less than
 but higher in
  .
.
-
"Norm 2 Mode' uses scientific notation for any number smaller that
 but higher that
  .
.
"Norm" is shorthand for 'normal'.
In Activity 1 you will have already configured your calculator to use Norm 2 mode, and we suggest for the time being you make use of this. To switch to Norm 2, use keys (SETUP) (Norm) followed by (for the Norm 1 mode) or (for) or (for Norm 2).
You can also configure the calculator to display the results using scientific notation using an established number of relevant numbers. You can do this by using the sequence key (SETUP) (Sci) to be followed by the number of significant figures required to display, for example . If your calculator is configured in this manner the display indicator SCI appears visible on the top of the screen. To cancel such a setting, simply use one of the key sequences described above to reset the calculator to 'Norm' mode.

Comments
Post a Comment